Configuring SCIM
After you have configured your SSO settings for Azure, you are now ready to configure SCIM. To configure SCIM for Azure, follow the steps below:
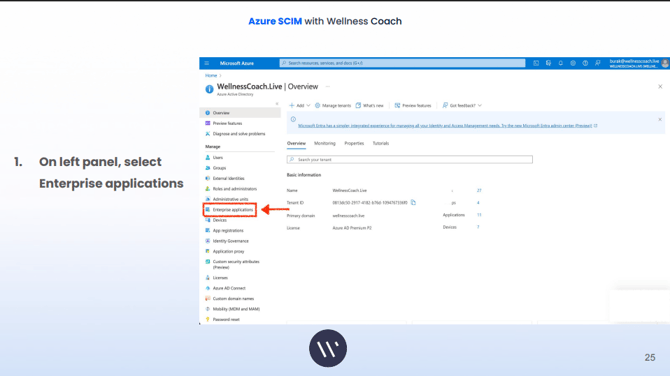
1. Go to Azure admin console and click on Azure Active Directory

2. On left panel, select “Enterprise Application”
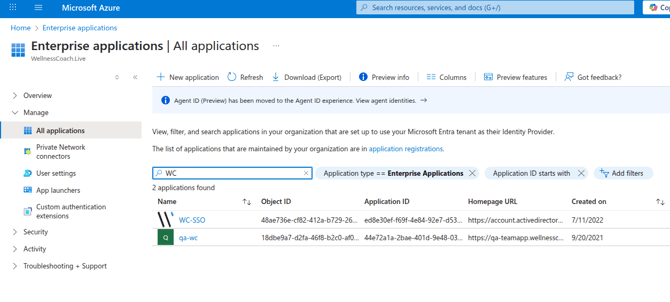
3. Find Wellness Coach Application (WC-SSO)
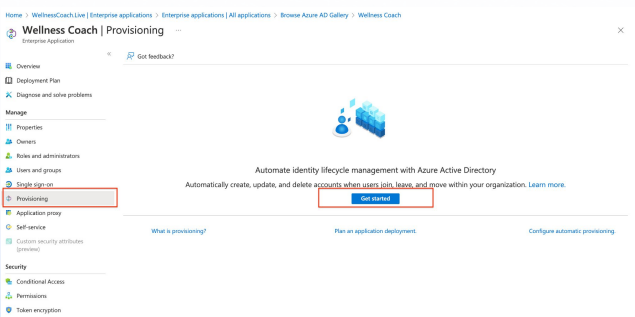
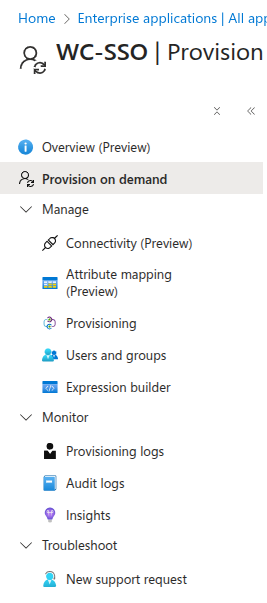
4. Select “Provisioning” on the left hand side menu and Click on Get Started
5. Complete the steps below
-
-
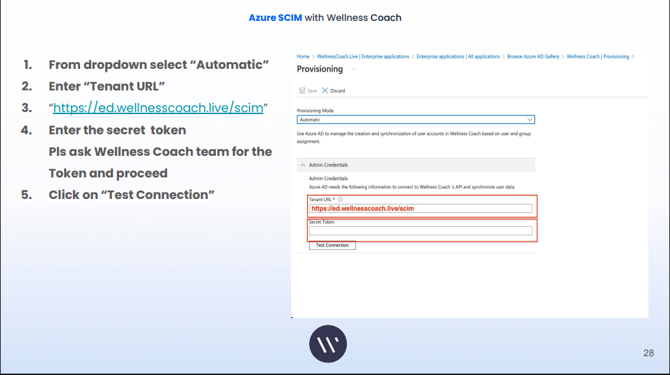
From dropdown select “Automatic”
-
Enter “Tenant URL” → “https://ed.wellnesscoach.live/scim”
-
Enter the secret token(Copy your SCIM token from portal account settings or please ask Wellness Coach team for the Token and proceed)
-
Click on “Test Connection”
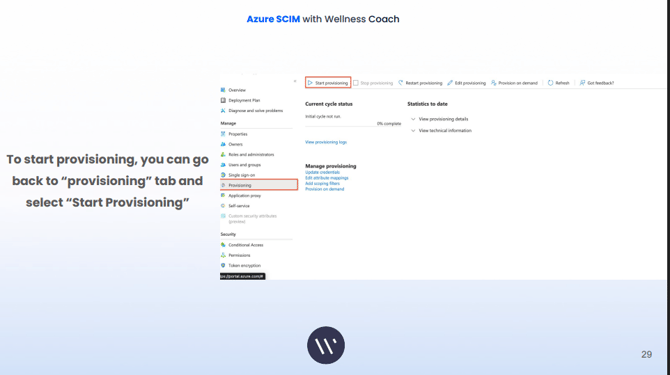
6. Go back to the “provisioning” tab and select “Start Provisioning.”
Default Mappings
The default field mappings are shown below:
|
Default Azure Active Directory Attribute |
Attribute |
Wellness Coach Field |
|---|---|---|
|
userPrincipalName |
userName |
|
|
givenName |
name.givenName |
First Name |
|
surname |
name.familyName |
Last Name |
|
employeeId |
urn:ietf:params:scim:schemas:extension:enterprise:2.0:User:employeeNumber |
Employee Number |
|
jobTitle |
title |
Job Title |
|
department |
urn:ietf:params:scim:schemas:extension:enterprise:2.0:User:department |
Department |
|
manager |
urn:ietf:params:scim:schemas:extension:enterprise:2.0:User:manager.value Note:For manager information to sync, the applicable managers must be included in the sync. |
Manager Email |
Note:The Division and Organization fields are unmapped by default. If you plan to use these fields, you'll need to add the mapping. You can add these attributes by following the instructions in the Adding Attribute Mapping for Custom User Fields section below.
Changing the Default Mappings
You can change the default mappings to customize the user information that syncs between Microsoft Entra and Wellness Coach.
To change the default mappings, follow the steps below:
-
From your Microsoft Entra ID, navigate to Enterprise applications.
-
Select the application you created for your KnowBe4 connection.
-
From the menu on the left side of the page, select Provisioning.
4. Click the Mappings drop-down arrow to expand the Mappings tab.
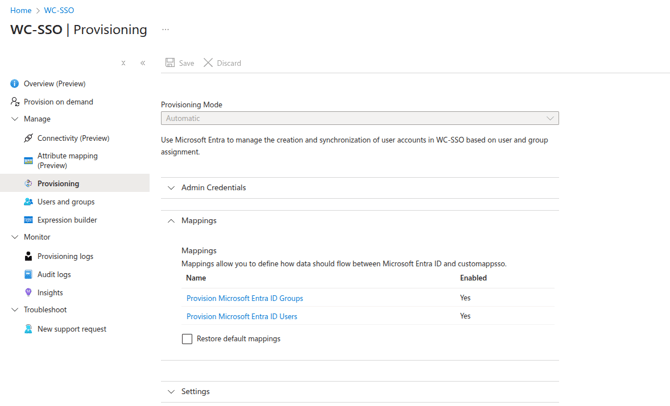
5. Click Provision Azure Active Directory Users.
6. Scroll down to the Attribute Mappings section. From this section, you'll see a list of all the attributes that have been mapped. The Azure Active Directory Attribute column displays the name of the attribute in Microsoft Entra. The customappsso Attribute column displays the SCIM standard name for this attribute.
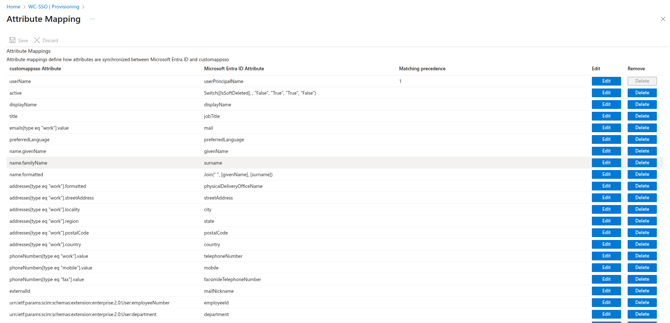
7. Select the attribute you would like to edit.
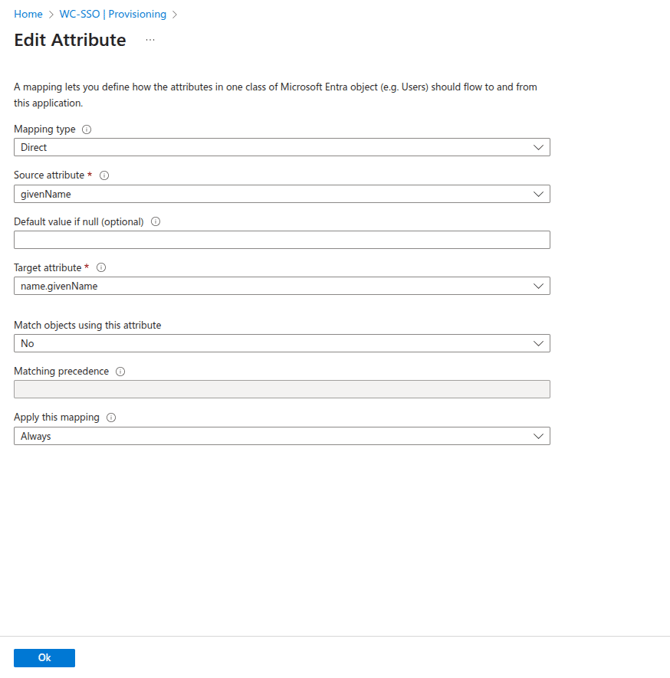
8. In the Edit Attribute side pane, customize the attribute. For details about the customization options, see the list below:
-
-
Mapping type: Select Direct from the drop-down menu.
-
Source attribute: Select the Azure field that you want to map to this custom field.
-
Default value if null: This field is optional, and we recommend that you leave it blank.
-
Target attribute: Select the custom field that you want to map to the Azure field you selected.
-
Match objects using this attribute: We recommend you select No.
-
Apply this mapping: We recommend you select Always.
-
9. Once you have made the changes you would like to make, click Ok.
Adding Attribute Mapping for Custom User Fields
You also have the option to custom fields. These fields are not mapped by default, but you can add them to Microsoft Entra by following the steps below:
-
From your Microsoft Entra ID, navigate to Enterprise applications.
-
Select the application you created Wellness Coach connection.
-
From the menu on the left side of the page, select Provisioning.
-
Click the Mappings drop-down arrow to expand the Mappings tab.
.png?width=670&height=490&name=3958dd3d-68b5-4812-ba3d-eece8b5ea54a%20(1).png)
5. Click Provision Azure Active Directory Users.
6. Click Add New Mapping at the bottom of the table.
7. From the Edit Attribute window, select the Source attribute you would like to use.
8. Then, select the Target Attribute that you would like to use. To view the supported custome attribute please visit this link.